601 West Lombard Street
Baltimore MD 21201-1512
Reference: 410-706-7996
Circulation: 410-706-7928
To set your scan configuration you first tell ScanStudio to save all project files to your new project workspace, then you configure your desired scan resolution settings. In general, the better the quality of scan the longer it takes. The main choices you have to make are:
To get started, walk through the following steps:
2.1. Open the ScanStudio software by clicking the icon on the desktop.
![]()
2.2. Set your project folder as the ScanStudio workspace. Go to "Edit", then "Preferences".

2.3. Click the "Browse" button in the navigation prompt to select the project folder you created in Section 1 of this guide.

2.4. Press the green "Scan" button to turn on the scanner and open up the scan settings window.

2.5. Get your object placed such that it's as close to the scanner while being fully visible in the scan preview display.
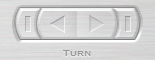
TIP: verify that your entire object fits within the preview display by rotating the platform using either "Turn" button.
2.6. Set your scan resolution choices. The image below shows good default settings for high quality scans, including:

NOTE: These settings have an implication for scan time. Higher divisions numbers and greater resolution result in longer scan times. As a point of reference, the scan in the image below took about an hour.
2.7. Press, hold, and drag your left mouse button to draw a rectangle around the object to tell the scanner what area of view you're interested in scanning.

2.8. Press "Start" to begin scanning.

TIP: Objects that are very dark, very bright, or shiny may have trouble being scanned on their own. There are tools that can be applied to these surfaces to help ensure scanning accuracy, such as a powder pen and markers (that wash off). See Innovation Space staff for access to these tools.